5 Tips To Get Started With Inkscape
Inkscape is an award winning free vector design program that can be used for all types of design projects. Here are 5 tips to quickly and easily get started with Inkscape.
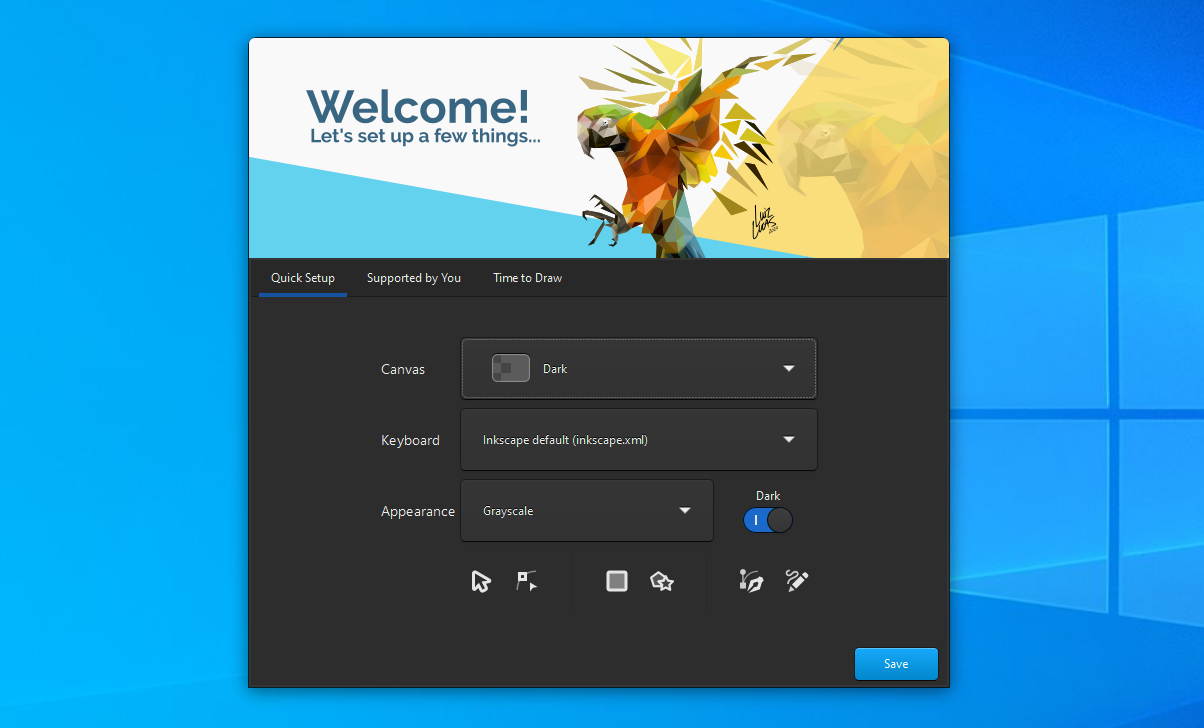
1. Run Inkscape in 'dark mode in 'Quick Setup'
One of the biggest knocks on earlier versions of Inkscape was the default user interface. Let’s be honest – it looked terrible! The white background, tiny multicolored icons, and total overload of toolbars was really off putting for a lot of users. In the newest versions of Inkscape, you get a chance to customize the interface and make it much more user friendly before you do anything else in the program.
When you run Inkscape for the first time, the Quick Seup dialog box will open first. Here you can make some basic choices about the user interface that can be extremely helpful. We highly recommend running Inkscape in Dark mode and using the ‘Grayscale’ appearance (see the above image for reference.) This will make Inkscape’s interface appear much easier on the eyes, and almost look more like an Adobe program. The tool icons will be much clearer in grayscale than the default multicolored icons, and the overload of toolbars won’t be quite as intimidating, which brings us to tip number 2…
Pro tip: Although it is available in most languages, we highly recommend installing Inkscape in English. Most online tutorials (including this one) will reference the names of tools and menus in English, so it's a good idea get started without needing to translate everything.
2. Hide unnecessary menus and toolbars
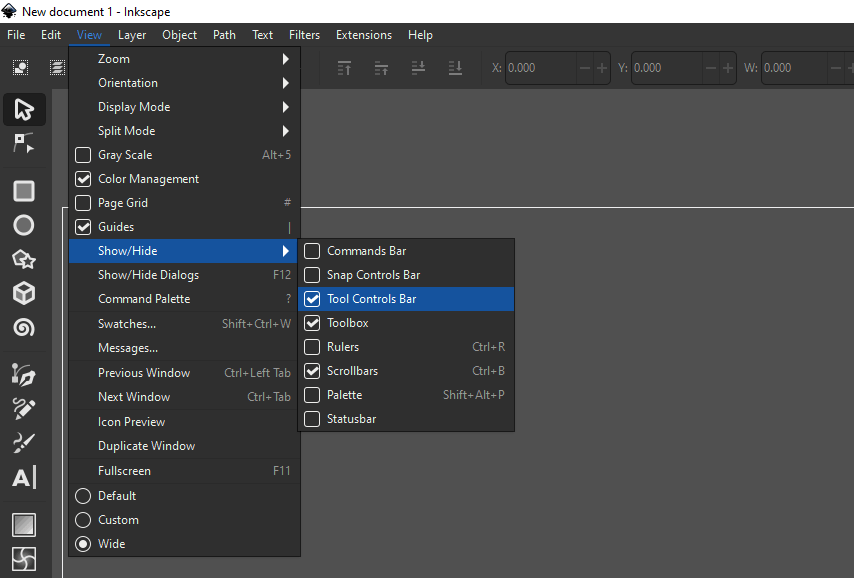
Once you create a document and open the program, you’ll notice that Inkscape is still quite overloaded with toolbars, which make the interface confusing, if not intimidating. New users really only need to have 3 toolbars open:
- Toolbox – all the primary selection, drawing and shape tools appear in the toolbox on the left side of the screen.
- Tool Controls Bar – Each tool has special functions that will appear in this toolbar at the top of the screen just under the main menu
- Scrollbars – the most basic part of navigating is to scroll up and down or left and right

To close the rest of the tool bars (or open them again later when you need them) go the top menu and choose View>Show/Hide> and uncheck the toolbars you don’t need. That’s it. With a much clearer and simplified user interface, you can much more easily focus on designing and being creative. Once you have your interface setup, you’ll need to be able to navigate it efficiently, which brings us to tip number 3…
3. Learn Navigation Shortcuts
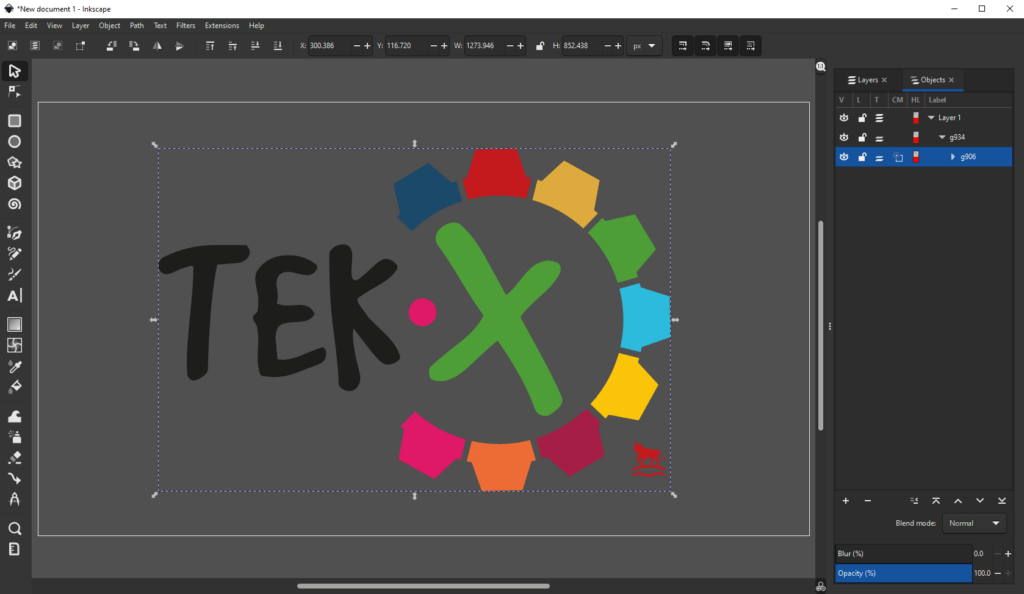
Once you get the user interface under control, you’ll want to learn how to quickly navigate through the workspace. You will definitely need a mouse to get the most out of the navigation. Short and sweet, it’s all about the scroll wheel. Use the scroll wheel on your mouse move the vertical scroll bar up and down, or hold SHIFT down and scroll left to right. If you hold CTRL, you’ll zoom in and out. See the video above for a quick demonstration, or refer to the table below for the navigation shortcuts.
| Mouse Wheel Shortcuts | |
|---|---|
| Scroll Up / Down | Mouse wheel up / down |
| Scroll Left / Right | SHIFT + Mouse wheel up / down |
| Zoom In / Out | CTRL + Mouse wheel up / down |
Pro tip: Remember, if you get lost in the workspace, you can always push the "5" button on your keyboard to re-center your document.
4. Combine Objects and Paths Using Path Functions
Now that you have control over the Inkscape workspace and know how to navigate it, you’ll want to get a handle on the most important creative tools and functions. Let’s get the basics out of the way: essentially, everything you create from scratch in Inkscape will either be an ‘object’ or a ‘path.’ No matter what you design or what workflow you use, you will most likely need to use both objects and paths, and understand the difference between them.
Objects vs Paths
When you use shape tools – fx. ‘Rectangle’ or ‘Polygon,’ these tools create objects, which have editable mathematical properties. Short and sweet, you can edit objects by editing the math – like adding points to star, or adding sides to polygons. Similarly, the Text tool creates objects that retain text editability. When you type text into Inkscape, you can come back and edit the text and font and so forth. Objects can be grouped together, but they can’t be combined into more complex objects. In order to do that, you’ll need to convert them to paths.
Paths on the other hand are pure, free form vectors with no predefined properties. The can be open or closed forms, and offer much more flexibility than objects. You can draw paths directly with the Bezier tool or Freehand line tool. You can also draw geometric objects and then convert them to paths. This is critical when you want to combine several elements of your design to create more complicated (even extremely complex) paths. For example, taking two overlapping forms and combining them to a single path can be easily achieved with the Union function.
See the video above for a concrete example of how to combine paths.
Refer to the section below for an overview of the path functions in the Path menu.
Path Functions
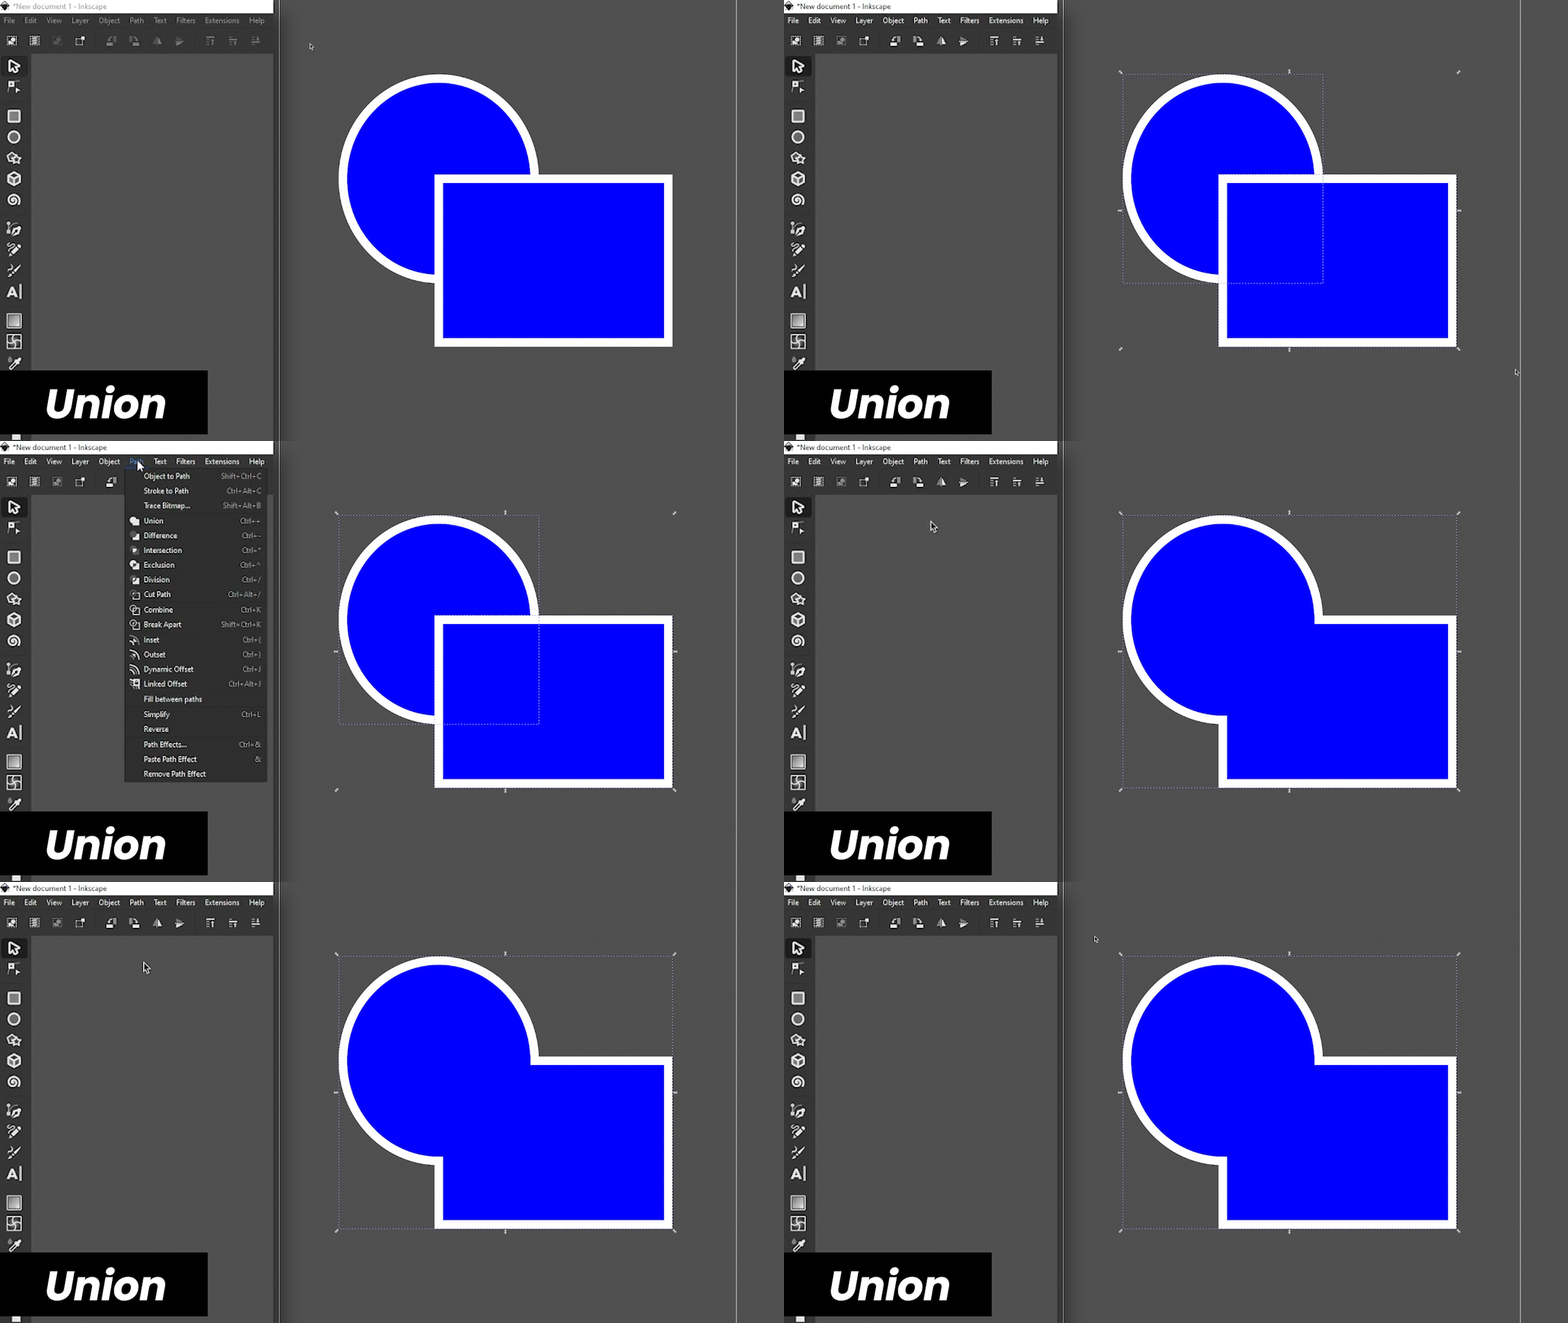
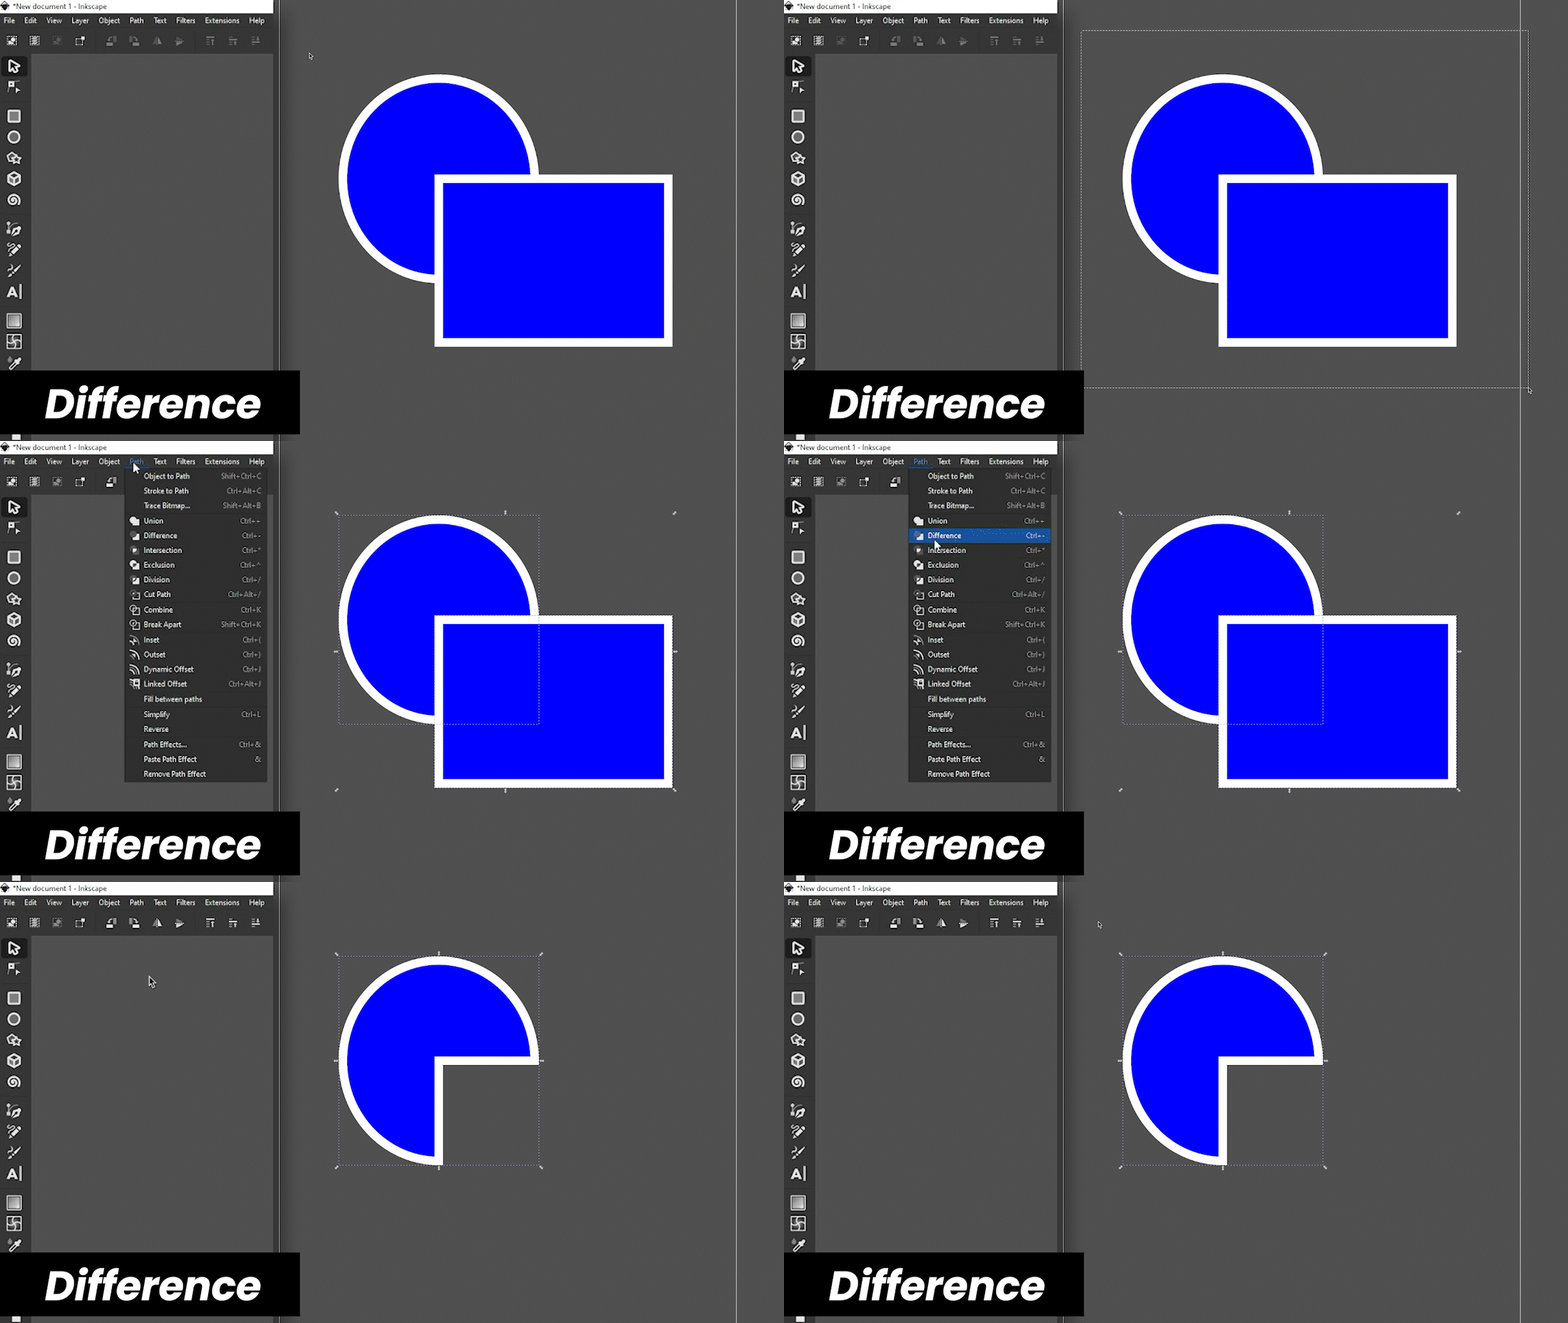


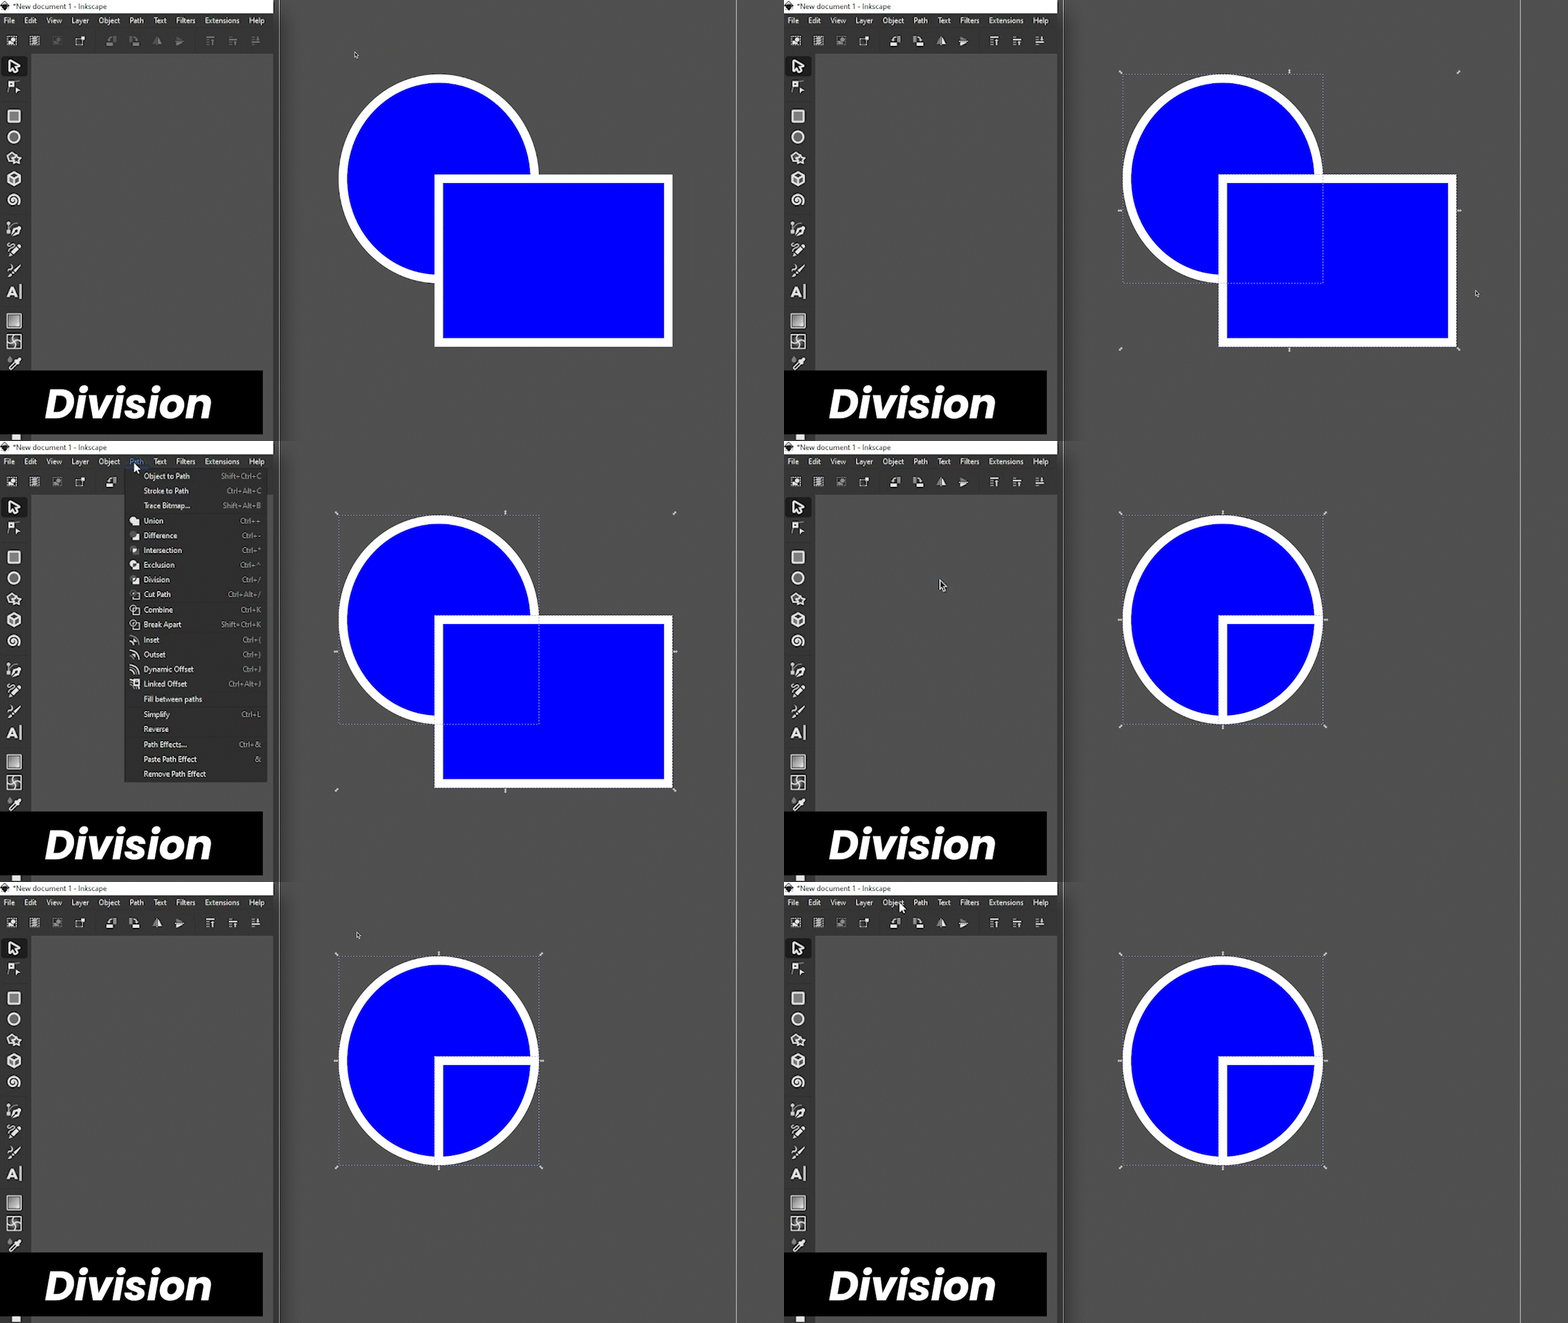

Pro tip: Convert objects to paths via the main menu - "Path > Object to path."
5. Draw and edit vectors with Bezier and Node tools
Designing in vector format, especially for projects at a makerspace like TekX, comes down to being able to create and control paths. It’s pretty easy to create circles and rectangles (and even stars or polygons) using those respective tools, however that’s just the beginning. In order to really build your Inkscape skills, there are two critically important tool you absolutely have to get good at using – the Bezier tool and the Node tool.
Learn to use the Bezier tool (Pen tool)
The Bezier tool functions almost exactly like the Pen Tool in Adobe Illustrator – it allows you to create vector shapes by creating nodes (anchor points) and adjusting the curve of the line between those points.
See the video we made about the Bezier tool to get a better sense of how it works. Once you’ve got a handle on the Bezier tool, you’ll naturally also want to use the Node Tool to edit your paths after you’ve drawn them.
Learn to use the Node tool
The Node tool allows you to edit and manipulate paths by adjusting the nodes and handles, or by clicking and dragging directly on the paths to change their shape. If you are used to Adobe Illustrator, the Node tool functions very much like the ‘Direct Selction’ tool.
The Node tool is also essential for combining two or more individual linear paths to form new shapes. The Node tool controls in the tool control bar offer several useful functions for working the nodes on paths.

Conclusion
Whether you are professional designer or a total noob, Inkscape can definitely be an extremely useful program to learn and master. Whether you want to create posters for a classroom, design puzzle pieces for a laser cutter, or create professional graphics for video, designing in vector format is definitely the way to go for a variety of creative applications. With the exception of an industry standard professional program like Adobe Illustrator, there is no better vector graphics editor than Inkscape. Did we mention that it’s completely free? Use these tips, and you’ll be able to quickly get started designing in Inkscape. We have also created a series of videos with tutorials that show how to really get started in Inkscape. Check out all the videos here on our dedicated Inkscape page, or watch the videos on our YouTube Playlist. Good luck and happy designing!
